Friday, February 21, 2014

Sausage & Rice Stir-Fry

Last night, I was LAZY!!  Like, seriously, don't wanna move off the couch, lazy.  And yet, there were a few mouths that felt I should feed them (where do they get crazy ideas like that?!  I mean, really...).  So, it was this quick and easy stir-fry that takes minutes to prepare and is super filling!  Not to mention, perfect for lazy nights!

Sausage & Rice Stir-Fry

3 cups cooked rice (I used white rice, but LOVE it with brown rice too...it just takes longer to cook)
1 lb cooked sausage
6 green onions, chopped
1/2 tsp garlic powder
3 1/2 tbsp soy sauce
 
 
Heat a wok or Calderon (or a pan with high sides) until hot.  Add the cooked rice and the chopped green onions and garlic powder.  Start stirring the rice so that the garlic is mixed well and "frying". 
 
 
Be sure your sausage is well cooked and crumbled into small pieces.  Add to the rice and onion mixture.  Stir to mix well. 
 
 
Add the soy sauce, stirring very well after each tablespoon.  We add 3 1/2 tbsp but you may prefer more or less.  Taste as you go.  Make sure you stir the rice really well after adding the soy sauce so that it gets mixed well.  Continue to stir-fry for a couple minutes.  And that's it! 
 
 
A super quick and easy sausage and rice stir-fry!  Enjoy!
 
Happily Homemade
Sandra


Thursday, February 20, 2014

Homemade Mayo

I love mayonnaise.  The real kind...not miracle whip, lite, or any other version.  Just straight up, full fat, mayo.  Unfortunately, like a lot of store bought, pre-packaged food, it can be full of not-so-good stuff. 

For example...take a look at the ingredient list on this jar we just used.  Notice the * beside the Modified Food Starch and then look at what that * says under the ingredient list..."ingredient not normally found in mayonnaise"??? 

 
Ummm...then why is it in there? Yeah, I know, I know...it's all about preserving and shelf stability, etc.  Still, if I can make it at home, with all natural ingredients...why wouldn't I?  And it's sooooooooo easy!!

Homemade Mayo

1 whole egg
1 egg yolk
1/2 tsp salt
1 tbsp lemon juice (or vinegar)
2 cups oil (I used vegetable because that's what I had on hand...you can substitute olive oil also)

Blender or bowl and whisk and arm muscles.
*Note about blenders...I have a Ninja Blender with a short container and a tall one.  Those of you that have one, know what I'm talking about (if you don't have one, ignore this note).  Use the tall one only!  For some reason, the short one will NOT whip anything...cream, mayo, nada!  So, spare yourself some wasted ingredients and use the tall one.*

 
Gather up your ingredients.  Add the whole egg (white and yolk) and the egg yolk into the blender with the salt and lemon juice.  Blend for a second, just until combined.  I used medium speed.
 
 
While blending, SLOWLY pour the oil into the blender.  After a moment you will see it start to turn white and thicken.  At that point, you can go ahead and pour in what's left of the oil.  Continue to blend, just until it's all combined (a second or two).
 
 
Open up the blender and see your yummy mayo!  If all the oil hasn't mixed in (like in the corners in my first pic), just give it a little mix with your spatula. 
 
 
Add the mayo to an old mayo jar and keep refrigerated.  It's sooo easy to make this, that I can't believe I've never done it before!  No more $4 jars of mayo for us!  And it tastes a lot like my fave brand of Hellman's/Best Food!  Yay!  Enjoy!
 
 
Happily Homemade
Sandra
 
**This recipe does contain raw eggs.  I am by no means saying these are good, or bad, for you.  Personally, I've eaten raw cookie dough and cake batter, and now mayo, all my life, with no harm.  Plus, it seems to work for Sylvester Stallone in "Rocky"...just saying :)  However, with that said, eat at your own risk.

Wednesday, February 19, 2014

Lemon Herb Chicken

I think I've killed my rosemary plant :(  I'm not sure if it was the pests that killed it, I over watered it, or what, but it seems to be on the verge of dying.  It's sad because I really have grown quite fond of rosemary.  I love putting a twig in the oil when frying french fries, or in this yummy Lemon Herb Chicken.  So, if it does die, I definitely know I will be getting some more.  I just need to figure out what happened so I don't make the same mistake.

But, you probably didn't come to this post to hear my woes about my rosemary plant...so here's the recipe for Lemon Herb Chicken.  It's really easy...just toss everything in the baking dish and, you got it, bake!  Thankfully, I was able to use some of the last of the rosemary in this recipe right before it kicked the bucket!


Lemon Herb Chicken

2 skin on, bone in chicken breasts (the skin is important to keep on, it helps keep the chicken moist)
4 tbsp butter
2 lemons (or 1 lemon and 1/2 orange...which is what I used because I didn't have 2 lemons)
3 tbsp olive oil
2 garlic cloves, minced
1 tsp thyme (I used regular and lemon thyme from my garden), chopped
1 tsp rosemary, chopped
salt & pepper to taste
4-6 red potatoes, cut into large chunks
 
Get out a baking dish and lay out a few lemon slices along the bottom...use about 1/2 of a lemon (or orange, like me...).   Take the other whole lemon and this 1/2 and juice for the marinade.  Make your marinade with the juiced lemons, olive oil, garlic, thyme, rosemary, salt and pepper.  Taste it.  Seriously, dip a finger in the marinade to see if it has enough salt...if not, add some more.  I used about 1/2 tsp probably.
 
 
I didn't snap a pic, but cut up your potatoes and roll them around in the marinade.  Add the potatoes on top of the lemon slices in the baking dish.  Add your chicken to the marinade and make sure to get all of it coated.  Slip a finger between the skin and meat so that the marinade gets in there also.  Let it sit for a few minutes (you can also marinade this ahead of time...I think an hour would be great.  I didn't marinade it prior to cooking and it still had great flavor).
 
 
Add the marinaded chicken to the baking dish, on top of the potatoes.  Make sure the skin side is facing up.  Pour the leftover marinade on top of the chicken.
 
 
Next, cut your butter into 4 squares (1 tbsp ea) and place 2 on the potatoes, under the chicken.  Then take the other 2 and place them under the skin of each chicken breast (one per breast).  No need to rub it in, the heat will melt the butter on the breast helping to add flavor and moisture.  Bake at 450F for about 45 minutes or until the chicken is done.  That's it!  You can serve with a side salad and you have an entire meal.  Or like us, barbarians that we are....
 
 
...start digging into the chicken before it's even plated (or a picture could be taken)!  The chicken is delish, with lots of lemony flavor.  Enjoy!
 
Happily Homemade
Sandra


Sunday, February 16, 2014

My Little Garden Spot...

One of my goals for this year is to grow 100lbs of fresh produce right on my patio and little hillside (a.k.a. the drop off...because it seriously is just a drop off of the patio...my whole yard in a nutshell!).

We are having a great "winter" so far in Southern CA with temps in the high 70s-90s.  It is making it fantastic to be outside piddling in the garden.  And things are definitely growing!  All I need now is a patio swing so I can stay out here forever!


My garden consists of what I consider "usable" plants.  To me, this means, either I can eat it (which is 99% of the plants), it helps with pest control, or it's beautiful to smell and look at (like those gorgeous hyacinths...isn't the color pop awesome!). 

 
I harvested my first romaine head yesterday!  It was starting to crowd out the onions and other lettuce, so I figured we'd better eat him.  If you look closely in the garden in the picture, you'll see I left the roots and just cut the head off, instead of uprooting the whole plant.  The lettuce will actually regrow into another, albeit smaller, head!  Two for one!


Yes, I can seriously stare at my garden all day...there's really something so peaceful and relaxing about seeing the fruits of your labor.
 
 
Radishes growing in a 1 gallon pot! 

 
I just bought some English Lavender today.  I already have a good sized French Lavender plant that the bees go nuts over, but read that it's actually the English Lavender that is best for cooking and making Lavender extract...which I can't wait to do!  So, I bought 2 English Lavender plants today!  I also, have some oregano planted right beside it (the small plant that is mostly hidden by the pink hyacinths).  I've never grown oregano, but can't wait to have it for my tomato sauce I plan to can this summer with all my tomatoes I'll grow.
 

This is my Mesclun Mix (baby lettuce) over the span of 1 1/2 weeks!   This is a great beginner veggie!  It is supposed to take a mere 30 days from seed to harvest and you basically just toss the seeds in the soil (ok...don't just throw them out there, but you really just scatter some seeds in your bed/pot/container and water...then watch them grow!).  And you can continue to sow the seeds every 2 weeks to have a continuous crop all season long!  By the way, this is the expensive baby lettuce mix at the store, so growing your own (which costs pennies) makes this a very valuable crop.
 
 
I also just planted some Yukon Gold potato sets yesterday!  In a trash can!  Yep, a trash can.  I made several good sized (nickel-quarter size) holes on the bottom and sides (along the bottom) for drainage.  You just add a few inches of soil on the bottom, put in your seed potatoes, cover with more dirt and once the plants come through the dirt and reach 4-5" tall, add more dirt to cover the plants.  Leave about an inch or two of the plant uncovered, and continue to add dirt when the plants reach 4-6" tall (always leaving an inch uncovered).  Do this all the way to the top or until the plants start to flower.  Once the plants start to die, stop watering and wait a week.  Then dump the trash can to find tons of potatoes!  This will be my first time doing it this way, so I can't wait to see how well it works!  I've heard nothing but great things about growing potatoes this way!
 
 
And finally, meet my little friends...Senor Bee and Senor Lizard (do you see the lizard in the right picture?...he just chilled in the carrots the whole time I piddled in the garden today.  I'm hoping he's helping me take care of the pests that are eating away at my broccoli and cauliflower seedlings).  The bees are LOVING the lavender and hyacinths I've planted, which will be great when I need help pollinating my summer plants.
 
What's in my garden:
 
*Italian Basil
*Cilantro
*German Thyme
*Rosemary
*Lemon Thyme
*Strawberries
*Carrots
*English Lavender
*Yellow Onions
*Romaine Lettuce
*Red Leaf Lettuce
*Green Leaf Lettuce
*Mesclun Mix (baby lettuce)
*Oregano
*Kale
*Broccoli
*Cauliflower
*Radishes
*French Lavender
*Mint
*White Daisy-looking flowers (they aren't daisies, but look like them...and since daisies are one of my favorite flowers, I have a pot of these!)


I've also got some seedlings started for my summer garden, which I will be planting at the end of March-April.  These are my cucumbers and pumpkins.

 
A bit harder to see are some of my tomato and chile seeds that have just started to sprout (they blend in with the dirt...but there are a few in there!).  I also have some cantaloupe growing in the right picture. 
 
Seeds I've Started for Summer:
 
*Homemade Pickles Cucumbers (small cukes that are perfect for canning)
*Pie pumpkins
*Cantaloupe
*Jalapeno
*Serrano chiles
*Roma tomatoes
*Cherokee Purple tomatoes
*Ace Bush tomatoes
*Brandywine tomatoes
*Green Zebra tomatoes
*Pineapple Tomatoes
*Rainbow Cherry Tomatoes (includes: sundrop (orange), gold nugget (yellow), brown cherry (purple), sweetie (red), green grape (green), super snow white (white), and a bi-color (pink/white striped) cherry tomatoes...literally a rainbow of cherry tomato colors!).
*Florence Fennel (bulb fennel)
*Parsley
 
Well, that's my gardening update.  I'll be back in the kitchen soon, promise!  In the mean time, are you gardening?  Are you planning to?  Tell me about it!  I'd love to know what you're planting!
 
Happily Homemade,
Sandra


Friday, February 14, 2014

Hummus, Chipotle Flavored...

Today we are headed to the Middle East with some homemade hummus.  One of my favorite beans is the chickpea, or garbanzo, bean.  I buy them dry and cook them myself.  I can eat a bowl of them, all by themselves.  They have a yummy buttery taste that really doesn't need anything added.  They are also great to toss into a salad, for some extra protein. 

But, if you are like the rest of my family, you don't just want to eat just plain chickpeas.  So, I cook extra and make hummus.  We love to eat hummus with tortilla chips, pitas, or veggies (ok, truthfully, I'M the only one that eats it with veggies...I don't have big veggie eaters in my house).  And because we are a family that likes things spicy, we add chipotle chiles!

Chipotles are dried jalapenos that are roasted and put into adobo sauce.  They bring a deliciously smokey taste to food.  It makes yummy hummus, outstanding hummus.

Chipotle Hummus

1 cup cooked, dried chickpeas (or 1 can if you don't cook the dry beans)
3 tbsp tahini (this is ground sesame seed paste...usually in the middle eastern section of the grocery store)
1 lemon, juice only
2 tbsp olive oil
2 garlic cloves, chopped
2 chipotles with some of the adobo sauce (more or less for spiciness...I used 1/2 a can)
1 tsp cumin
water
salt to taste

 
Hummus is super easy to make.  You basically gather all your ingredients and put them in a food processor/blender and make a paste.  That's it!  You need to add the beans, water, tahini, garlic, lemon juice, and oil first.  I added about 1/3-1/2 cup water...start with a little and add as needed to get the consistency you like. 
 
 
Next, go ahead and take out the chipotles and add to the hummus.  I didn't chop them since the blender would be doing that for me...the less work, the better, right?  You can continually taste the hummus until it becomes as spicy as you like.  I ended up adding half the can for us.  After you add the chipotles, add the cumin and salt.  Blend.  Taste.  Need more salt?  Add it.  Repeat until it's as delicious as you want it!
 
 
And that's it!  Easy Peasy!!  This goes great with some yummy Pita Bread!  Enjoy!
 
Happily Homemade,
Sandra


Wednesday, February 12, 2014

Homemade Cream of Mushroom Soup

I love cream of mushroom soup.  I love mushrooms.  I know, it's either a love it or hate it, kind of veggie.  If you love it, you'll be scooping some of this soup into a bowl and warming your soul on a chilly night.  If you aren't crazy about it, you can freeze the soup and use for this awesome Chicken Pot Pie.  We make a ton and do both!


Cream of Mushroom Soup

8 oz mushrooms, sliced
2 tbsp chopped onion
1 tbsp chopped garlic (about 2-3 cloves)
2 tbsp butter
1 tbsp flour
2 cups beef broth
1 cup heavy cream
Salt and pepper for taste
 
I ended up tripling the batch because I wanted some to eat and to freeze.  So, if you wonder why there is a huge pot...now you know.
 

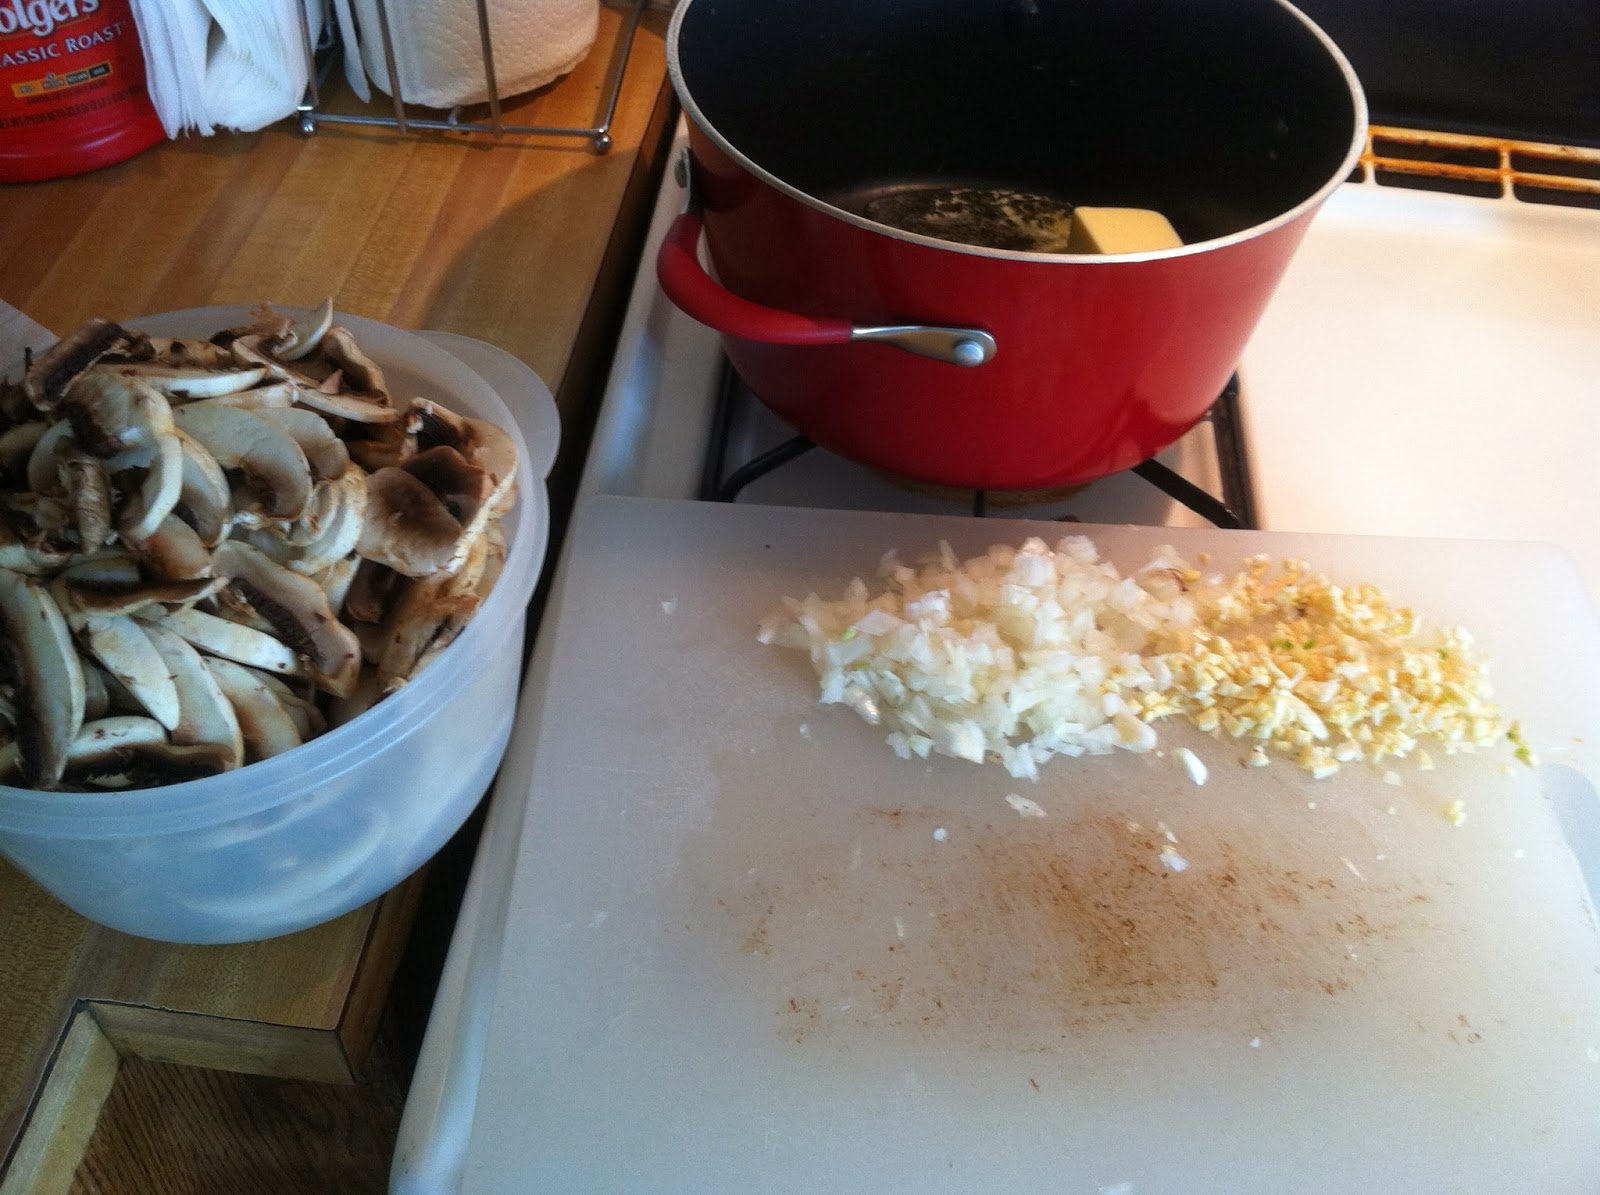
Add your butter to a hot pan and melt.  Go ahead and chop your onion and garlic also (and mushrooms if you bought them whole like I did).


Add the onions and garlic and saute until they are soft.


Add your mushrooms and stir until they are dark brown and cooked down.  Once the mushrooms are cooked, add the flour and stir well. 


Add the beef broth and bring to a boil, stirring occasionally.

 
Add the heavy cream and salt and pepper to taste.  Stir well.  Let the soup cook for a few minutes to thicken, making sure to stir constantly.  The heat should be about medium.

 
This part is completely optional.  I like my soup to be fairly thick, so I take about 2-3 cups of mushrooms and blend it.  You don't have to do this.  Some people don't because it does give the soup a grey color some find kinda gross.  Personally, it tastes too good for me to care :)

 
Add the pureed mushrooms back into the soup and heat and stir until thickened.  All done!  At this point, you can serve it up and enjoy, or let it cook and bag it up to freeze.  We did both.  My tripled recipe gave us about 5 bowls of soup and 6 cups to freeze.  The frozen soup will make 4 pot pies!  And the taste is way better than that canned stuff, not to mention better for you!  So, make some up and Enjoy!
 
Happily Homemade
Sandra


Sunday, February 9, 2014

Sopa de Arroz (Spanish Rice)

My family loves sopa de arroz, otherwise known as Spanish rice.  It never lasts long when I make it and it makes a great accompaniment to other Mexican dishes.  It's also super easy to make.


Sopa de Arroz

1 1/2 cups white rice
1 tbsp chopped onion
1 can tomato sauce (the small cans)
1 tbsp bacon lard
Knorr chicken base
Garlic powder
Pepper
3 cups water
 
 
Get out a large pan with a lid. Add the bacon lard (or oil if you choose) and melt over high heat.  Add the onion and saute until the onions are tender. 
 
 
Add the rice and saute until the lard is absorbed and the rice is just slightly toasted (the rice will be look whiter).
 
 
Once the rice is slightly toasted, add the can of tomato sauce.  Stir well and let it cook for a couple minutes.  Add the chicken base (I used a wooden spoon full...probably 1-1 1/2 tbsp) and some pepper and garlic powder to taste.  Stir and continue to cook for a couple minutes until the rice has soaked up most of the liquid.
 
 
Add about 3 cups of water and stir. Bring to a boil and then cover.  Turn down the heat to low and cook for about 20 minutes or until the liquid has been soaked up (a glass lid works best...try not to lift the lid or the steam will escape).
 
 
Once the liquid has been absorbed, remove the lid and turn the heat up to high.  Stir-fry the rice so that it isn't so sticky.  And that's it!  Sopa de Arroz!  Enjoy!
 
Happily Homemade
Sandra