There is a great Greek fast food joint over there. God spares me from having to go over there so I don't eat there every day! They have the BEST gyros, pitas, and tzatziki sauce! The gyros are so big you could get about 3 regular sized ones out of the one gigantic gyro they give you! It's Divine!!! It's also a bit pricey and I had the kiddos with me (yes, like any other good mama, I occasionally splurge if my kids aren't with me...it's too expensive if they are! haha Bad mama, I know!).
So, I came home and made my own pitas and tzatziki sauce. I don't know how to make the gyro meat...yet. Someday. Until then, I make pitas, tzatziki sauce, and then super thin turkey burger patties...pretty tasty, I think.
Tzatziki Sauce (Greek Cucumber Yogurt Sauce)
1 cup plain greek yogurt ( I make my own crockpot Greek yogurt HERE)1 cucumber, seeded, shredded, and drained
1/2 tbsp minced garlic
lemon juice
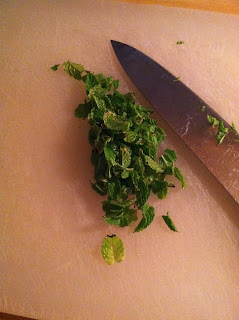
1tbsp chopped fresh mint (you can use fresh dill also, but I grow fresh mint, so that's what I use)
Gather up your ingredients. I grow herbs, and mint is one of them. I LOVE mint! I wish my plant was bigger, but for some reason, mint and I aren't the best of friends...this plant has lasted the longest simply because I left it in a pot. When I transplant it, it dies. Always. Even though I will see "wild" growing mint everywhere and they are the size of small trees. Sad. So, I take what I can get. Someday, I will figure out the trick to huge mint plants.
Take your cucumber and using a spoon, scoop out the seeds. Cukes have a lot of water, and if you leave the seeds in, it will make your sauce too soupy. Once you de-seed your cucumbers, use a cheese grater and grate the cuke. You could use a food processor, which I think I will do next time as the grater was a bit of a pain. Your goal is to make sure the cucumber is in very fine pieces, not big chunks.
Like I mentioned, cucumbers have lots of water in them naturally (see the first pic...that's after I grated the cucumber). You can do a couple different things to get the excess water out...place some coffee filters in a strainer and let the cucumbers drain for a while until the water is drained out. Or, if way too impatient for that...squish as much water out with your hands and then roll in lots of paper towels. Press until the cucumbers are dry and most of the water is out.
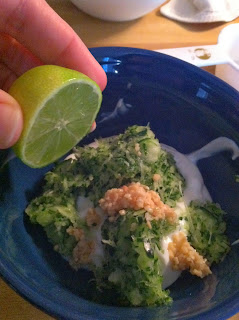
Chop your mint (or put in the food processor...you want the mint to be very fine also). Add the cucumber, garlic, lemon juice, mint, yogurt and a pinch of salt and pepper and stir until everything is incorporated. I like to taste the cucumber in my tzatziki. If you like yours to be more yogurt-y, just add more yogurt (the restaurants typically make theirs with a lot more yogurt...adjust to your taste preference).
Let the sauce sit, covered, in the fridge for at least 30 minutes for the flavors to melt together! Then eat with pitas! Enjoy!
Homemade Pita Bread
1 cup hot water (I just use hot tap water)
2 tsp active dry yeast
2 1/2 cups flour (plus extra if kneading by hand)
2 tsp salt
1 tbsp olive oil
Add the yeast to the hot water in the bowl of your stand mixer (or if you don't have a stand mixer, the bowl you will mix your dough in). And just a little product promo...if you don't have a stand mixer, a Kitchen Aid is the BEST! I LOVE LOVE LOVE mine and honestly rarely mix anything by hand these days! They are a bit pricey, but if you do a lot of stuff in the kitchen, I would urge you to consider one. Plus Christmas is coming up...let your hubs know what you REALLY want! Ok, back to our regularly scheduled recipe... Let the yeast sit for about 5 minutes or until it starts to get foamy.
Add the flour, salt, and olive oil. Use the dough hook and mix until the dough is all incorporated and doesn't stick to the sides. I actually had to add about a 1/2 tbsp of water to get the dough to incorporate...you may not, that's ok. Mix the dough in the mixer for about 8 minutes or until the dough is a smooth ball. If doing all of this by hand, first, I'm sorry...nah, just kidding. Use a wooden spoon to mix the flour and ingredients together. Turn the dough out on a lightly floured surface and knead by hand for about 10 minutes, adding flour as needed, until the dough is very smooth and soft.
See how smooth and pretty the dough is?! Once it's kneaded, take it out of the bowl and shape into a smooth ball. Spray your bowl with cooking spray (or wipe with olive oil) and roll the dough until all sides are covered. Leave the dough in the bowl, cover and let rise for about an hour, or until doubled in size. You can also use the finger poke test.
The Finger Poke test: Once the dough has risen (usually double in size), gently poke your finger into the dough and watch...if the dough rises back and your hole disappears, it is NOT ready. If the hole stays, like in my picture, the dough IS ready. Easy peasy.
When you dough has risen, gently punch the dough down. Turn out onto a lightly floured counter and cut the dough into 8-12 pieces (I started with 8 pieces, but they were too big). Toss the ones you aren't using back into the bowl and cover while you work with one, so they don't dry out.
Flatten each ball into a disk shape with your hand. Then get out the rolling pin and roll out into a circle (good luck...I have a hard time making perfect circles too!). You want the dough to be about a 1/4" thick...not too thin or it will end up being more like a flour tortilla (still yummy, but not exactly what we are trying to achieve).
Before you start rolling out the pitas, get a flat skillet/griddle and set over medium heat. You wan the skillet to be hot. Once the pita is rolled out, toss onto the skillet. You'll start to see bubbles appear all over the pita. Let the pita fill with bubbles. Flip the pita and watch it rise! I have to admit, it's pretty cool when you see it puff up like that, but honestly, most of mine puff up in parts. Rarely does the whole thing puff up like the perfect pita. It's ok if yours are like mine. Just make sure both sides are cooked (they won't look like dough...it only takes about 30 secs-1min-ish per side). You will still be able to cut them open and stuff if that's what you like to do.
As you make the pitas, wrap the finished ones in a towel or paper towels to keep warm. They are best eaten fresh, of course, but are definitely just as yummy if warmed up the same way (in the skillet) the next day. I store mine in a freezer bag in the fridge.
Make some turkey burgers (ground turkey, salt, pepper, paprika, garlic powder, onion powder, and Cajun seasoning...made into a patty and flattened very thin and cooked like a hamburger), stuff into a pita with some tzatziki sauce and devour! Or just tear off bites of pita and dip into the sauce! Either way, it's delicious! Enjoy!
Happily Homemade
Sandra


No comments:
Post a Comment